Step By Step Instructions How To Create An Ubuntu Server On Rackspace.Com
Part 1 - Need a Server?
Need a server? Consider a Rackspace Cloud Server. If you haven't signed up for a Rackspace Cloud Server, do it now by clicking on the Rackspace banner below. Rackspace is one of the largest providers of virtual and bare metal servers. They are highly reliable and we use their trusted services for a number of our clients.
Sign up for a Rackspace cloud server through Simple Information and we'll pay the first month's hosting fees for you! Click Here

Part 2 - How to Set-up your Server
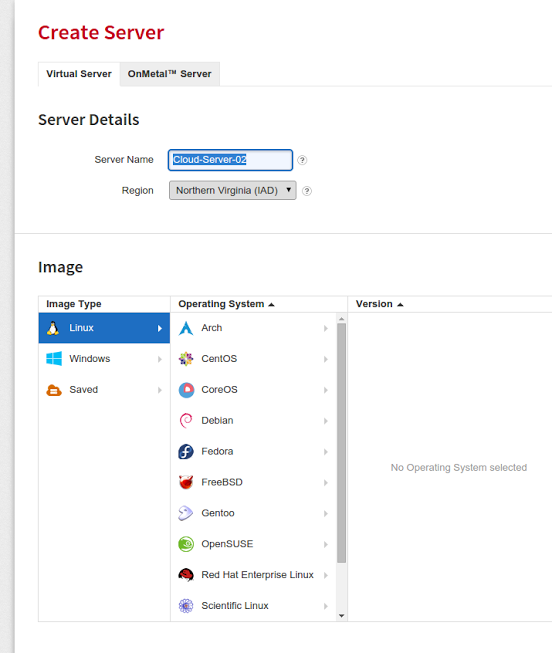
Once logged into Rackspace click on the 'server' tab in the top navigation, then the 'create a server' tab. You will be directed to the page below and offered two choices: Virtual Server and OnMetal Server. In this guide we will only cover the virtual server. In the virtual server details choose a name and the region of your server. As you can see you are then given a choice of OSes, as we are a Drupal shop we will be operating exclusively in Linux and in this instance we will be using Ubuntu 14.04 (LTS) which can be selected in the operating systems and version categories. No matter what version or OS you choose be sure the choose a LTS (or long term service) since it is guaranteed service for 5 years.
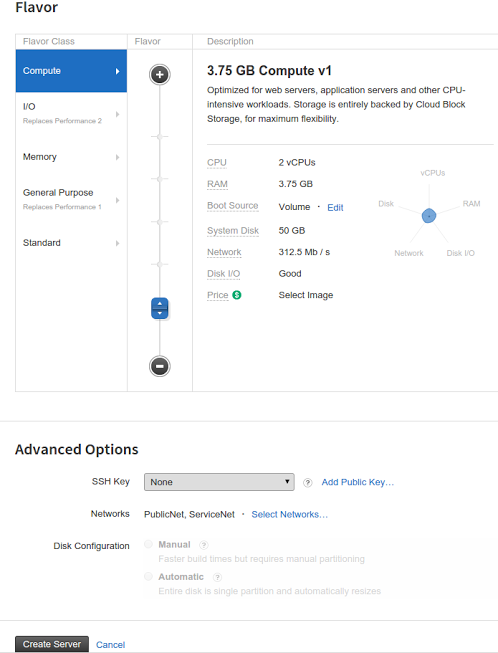
Next you will choose your 'flavor' or your plan based on application needs. Your choice is determined by your own server needs. In advanced options you can add a SSH Key and tamper with networks and disk configuration. Once all the options are set to you preferred settings go ahead and click the 'create server' tab.
Part 3 - After Server Set-up
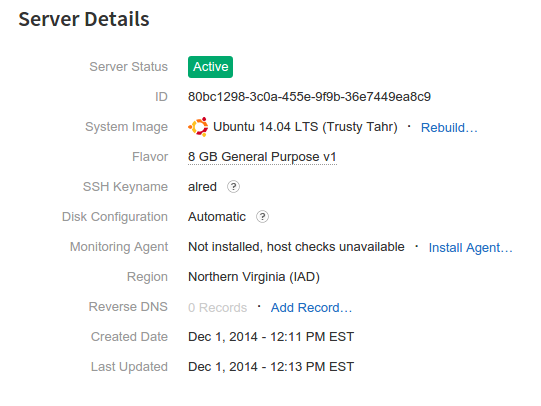
After you have prompted the server to be created you will be directed to the server details page with an active green server status when complete. While the server is being created a pop-up with your personal passcode will display. Be sure not to lose your passcode. In the column to the right of your server details under 'managing your server' you will see the ssh code to access your server via the terminal along with helpful articles on configuring and monitoring your server.
Part 4 - What To Do Next
Check out our next article on setting up a LAMP server for the Rackspace instance you just created!